Once upon a time, many summers ago, a girl discovered home canning. She canned and preserved. Jammed and jellied. Salsa and sauces. Pickles, chutneys, and marmalades. It was a fun time. It was a messy time. Then the girl had to go back to her day job and she never canned again.
Well, almost. I still make a seasonal batch or two of jam. My kids demand it. So while I’m at work, my husband desperate to keep the kids entertained during the summer months puts the kids in the car and drives. They drive around the town, the county, to road side stands and pick-your-own farms and they buy fruit. Lots of fruit.
And then they ask for jam.
Last year it was strawberry banana jam. This year, it’s this….
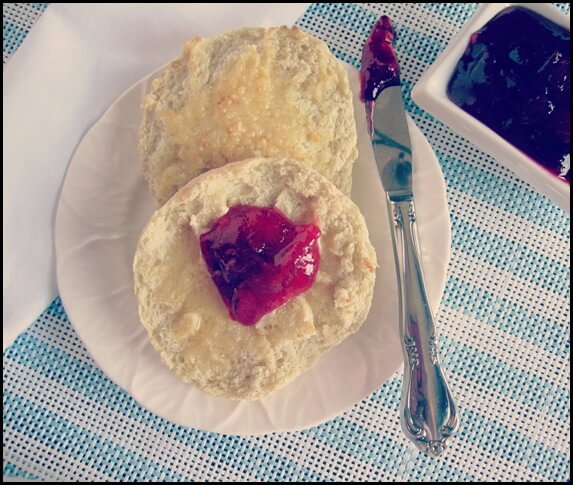
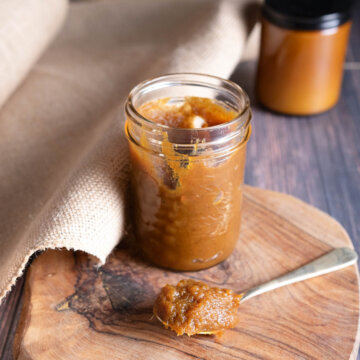
Summer Fruit Jam
Sometimes the best jam comes from what needs to be used soon. A few peaches, a few plums and some berries. I threw in the cranberries at the end because I thought they would add a little tartness to the jam. The cranberries were frozen.
I just love the colour of this jam. It’s bright and pinkish. Not quite red.
Fruit should be clean and dry. Peaches are peeled and chopped, plums unpeeled and chopped, berries are only smashed. Most fruit has natural pectin – the stuff that makes jam set. Plums, especially with the skin on, are higher in pectin than some of the other fruit in this mix, so adding plums allowed me to use about 7.5 cups of fruit total to one package of pectin. Unpeeled apricots would be a good substitute.
- 2 cups peaches
- 2 cups strawberries
- ½ cup cranberries
- 1 cup blueberries
- 2 cups plums (I used the tiny yellow ones, but any kind will do)
- 1 package pectin crystals (i use Certo Light)
- 2 tablespoons lemon juice
- 5-½ cups sugar
First some rules about jam making. Making jam is really not that complicated or time-consuming. The trick is to get yourself prepared first and do things in the right order. Some tips:
- Be sure to read the general jam preparation procedures for the pectin crystals you choose. All brands are slightly different. Different fruit require different fruit to sugar to pectin ratios so get familiar with the recipes and suggestions in the package.
- I usually wash and dry the fruit first – but do not chop, peel or smash – then get all my gear ready. This allows the fruit a little extra time to air dry. Water will cling to the fruit, especially berries, and added water will just make a runny and watery jam.
- Prepare your jars before you begin preparing the fruit. Wash them well with hot soapy water, rinse and dry. You can sterilize the jars by placing them in a 225 degree oven for at least 10 minutes. I get the jars in the oven before I start preparing the fruit… it’s okay for the jars to hang out in the hot oven until you are ready for them.
- Gear you need:
- small heat proof bowl to cover the seals with hot boiling water. Put the seals in the bowl now, so they are ready when the water is boiling.
- tongs to pick up the seals from the hot water
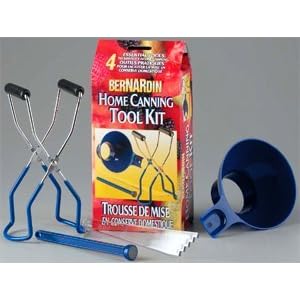
- a canning kit is helpful but not essential. They are relatively inexpensive and some kits come with tools you can do without – but they come with this little stick with a magnet at the end specifically for fishing the seals out of the hot water.
- oven mitts
- tea towels – you will need more than you think
- deep stainless steel pot for cooking the fruit jam
- potato masher
- long wooden spoon
- a jar funnel is useful for getting the jam into the jars without making a mess of the rims – see kit above
- a ladle for filling the jars
- Use new seals. Obviously jars and rings (also called bands or “hands”) can be reused, they just need to be cleaned.
- Have ready a kettle of boiling water – as in a tea kettle (I don’t mean a canning kettle in this case – this jam does not need the “hot water bath” that other preserves need). When the time comes you will want to let the seals sit in hot water for a few minutes before filling and sealing the jars.
- Ensure you bring your fruit to a really hard boil. The kind of boil where you don’t want the kids near the stove and you wish you were wearing Teflon gloves up to your elbows. It should be spitting and angry. Don’t start timing the “boiling stage” of your jam until you’ve reached this stage where you almost afraid of it.
- After you remove the jam from the heat, stir it! It really is important. Stirring will bring any foam to the top – which you should skim off – and helps the jam set. Ever seen jam where all the fruit has floated to the top of the jar? That jam was not stirred and skimmed enough.
- Once jam is in the jars, wipe the rims with a clean tea towel, place the seal on the rim, and tighten the band “finger-tip tight” this means you tighten them by hand – don’t use any gadget to help you. I usually tighten the bands as I would normally for something like a jar of peanut butter or something like that, then give the band one more half turn. Too tight or too loose and the seal may not seal.
- Fill, seal, tighten lid one jar at a time.
- If you have a not quite full jar at the end, just let it cool and stick it in the fridge. Only full and sealed jars should be kept for long term storage.
- Allow the filled and sealed jars to sit undisturbed until cool. You should hear each of the jars “pop” as they seal. A good 6 hours, I usually put them in an out of the way place until the next day. Just a note - kids will want to test the seals for you, well before the seals should be tested. Out of kid reach is a good idea.
- Once the jars are cool – and not before – test the seals to make sure they have sealed. They should not wobble when you press the middle. If they do, stick that jar in the fridge and use it first. Unsealed jam will last in the fridge for several weeks.
So once you are set…..
Follow the directions in your pectin package. Mine requires ¼ cup of the measured sugar to be mixed with the crystals separately.
Clean and prepare fruit as noted. In a heavy bottom sauce pan, add fruit – one layer at a time – and smash with a potato masher. Add another layer of fruit and smash that layer… and so on, until you have smashed all 7.5 cups of fruit. Even chopped fruit (peaches and plums) should be mashed. Don’t use a food processor to chopped the fruit. Add lemon juice and the pectin-sugar mixture.
This is a good time to get the kettle boiling. Here it the most multi-tasking part of jam making. Once the kettle is boil… which will probably happen sometime while you are stirring… poor the hot water over the seals in that heat proof bowl.
Okay - so you are cooking the fruit over medium-high heat, bring fruit to a boil. Add remaining sugar and bring to hard boil – see #7 above. Boil hard for exactly 1 minute. Stirring constantly.
Remove from heat and continue to stir jam for 5-7 minutes. Skim any foam that rises to the top.
Remove jars from the oven. Fill the jars to ¼ inch from the top. See #9 above.
Makes about 8 cups, or 4 500ml jars.





chefconnie says
Great combo of fruits. I will have to try this recipe. I love canning and am glad you inspired me with a new recipe.
Kristy says
My daughter would love this jam. In fact, I'm sure it would be one of her favorites. It looks so beautifully red and fresh. 🙂
annesturetucker says
Looks delicious!!! I love homemade jam especially taking out a jar of summer, in January when it is cold and dark outside 🙂