

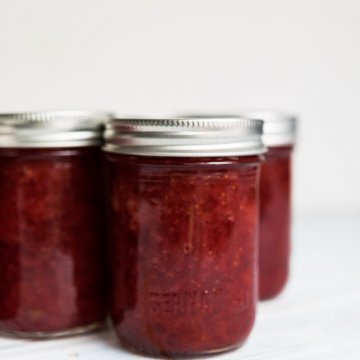
Strawberry banana Jam! Yes - that is right! It is a thing, and it is divine. This simple jam will become your favourite summer fruit jam. Strawberry & banana is a classic flavour combination; it only made sense to make it a jam. Spread on toast, perfect for your favourite PB&J or dollop over vanilla ice cream.
For more water-bath-canned preserves, try this strawberry-rhubarb marmalade or this easy apple pie jelly.
This post was originally published in June 2011. I've updated the post with new pictures and clearer instructions for water-bath canning.
This jam is divine. Strawberry banana is a classic flavour combination, and this strawberry banana jam will quickly become your favourite.
Consider your next peanut butter and jam sandwich with just a hint of banana. Just enough to notice. A wonderful thing.
It's so good.
I couldn't keep the kids away.
Our jam is made from the strawberries growing in the backyard (a mother's day present gone wild - who knew 2 little plants could become a patch so quickly?) The banana flavour is subtle, just enough to make you say "oh.."
Those small "local" strawberries work best. More flavour per square inch than those ginormous supermarket berries.
This jam recipe is for water-bath canning
Must you use a water-bath to make this jam?
Yes!
Yes - you should always process your jam. The simplest and lowest-cost way to do this is using a water-bath canner.
There was a time when I might have recommended filling the jars and letting them seal naturally. I have come to learn that jam should always be processed to ensure long-term safe storage. An unprocessed jar is a perfect place for bacteria to grow. And while your grandma may never have done it, and "no one ever died," Why take any chances?
Waterbath canning does not take that long. Yes, it can be hot and heat up the kitchen, but it is not that complex. Even with small-batch jam (actually my preferred method of canning) its not that much trouble. I can throw a small batch together - prepping the jars all the way to cleaning up my mess - in a couple of hours.
Don't skip the water-bath processing. Just don't.
If you are new to water-bath canning or just want to see my workflow, see this post for step-by-step instructions and information about the gear you need.
Ingredients for making Strawberry Banana Jam
This is a light pectin jam recipe
Pectin: You will need pectin for this recipe. I used Certo Light Pectin in this recipe. Other types of pectin may require different techniques or sugar quantities. Pectin is not interchangeable. Light pectin allows me to use less sugar than regular pectin. Just enough to get the right level of sweetness. Certo Light Pectin requires ¼ cup sugar to be mixed with the pectin crystals and cooked into the fruit separately.
Crush the berries: do this in layers; in a large bowl, 1 layer at a time, pouring each crushed layer into your measuring cup before adding more berries to the crushing bowl. Crush the berries with a potato masher or fork. Do not use your blender or food processor to chop the berries. Do the same with the banana. Continue crushing the fruit until you have 6 cups.
Banana: This is a strawberry jam. Not a banana jam. Banana is just a highlight flavour. Banana is a relatively low-acid fruit and cannot be used on its own or in large quantities in jam-making (using the water-bath method). So keep the ratios below 5-½ cups of crushed berries and ½ cup of mashed banana. You will need about 1 large banana. Banana should be just yellow and slightly spotted.
Lemon juice: To keep the acidity up in the jam, add a little bit of lemon juice. The lemon brightens the flavours, making the jam fresh-tasting.
Sugar: Don't reduce the sugar in this jam to keep acidity levels right.
More jam and jelly recipes:


How to make strawberry banana jam using a water-bath canning method
Boil the jam: In a large saucepan, add the fruit, lemon juice, and pectin (mixed with ¼ cup of the measured sugar), then boil over high heat. Once boiling, add the remaining sugar and return to a hard boil and boil for 1 minute
TIP: A "hard boil" means the fruit is bubbling and spitting, and cannot be stirred down.
Skim off the foam: Remove from heat, and stir and skim for 5 mins. Skim off any foam that collects on top. It is important to stir and skim for the full 5 minutes; this helps create a clear jam and ensures the fruit does not float to the top as it sets.
Sterilize the jam jars: To sterilize the jars, I tend to use a couple of different methods depending on whatever else I have going on in the kitchen
- Place jars in the simmering, partially filled water-bath canner. This helps warm with water while you are prepping the fruit and making the jam. When ready to fill the jars with cooked jam, remove one jar at a time from the canner, emptying the water in the jar back into the canner. Fill the jar and seal, then place it back into the canner. Repeat. OR
- I place the washed and cleaned jars in a 225-degree oven for at least 10 minutes. Preheat the oven while you gather your ingredients and wash the jars. Then I just place the clean jars on a cookie sheet and set them in the oven while I prep everything else and make the jam. When ready to fill jars, I take one jar out of the oven at a time, fill it, seal it, and place it into the heating canner.
Fill jars: to ¼ inch from the top of the rim of the jar. Wipe the rim clean, place the seal and screw cap on the jar and tighten. Place the filled jar in the canner. The canner should already be on the heat and partially full of water. Place the jars in the canner as you fill them, using the jar basket to hold them upright and in place. Proceed to fill the remaining jars.
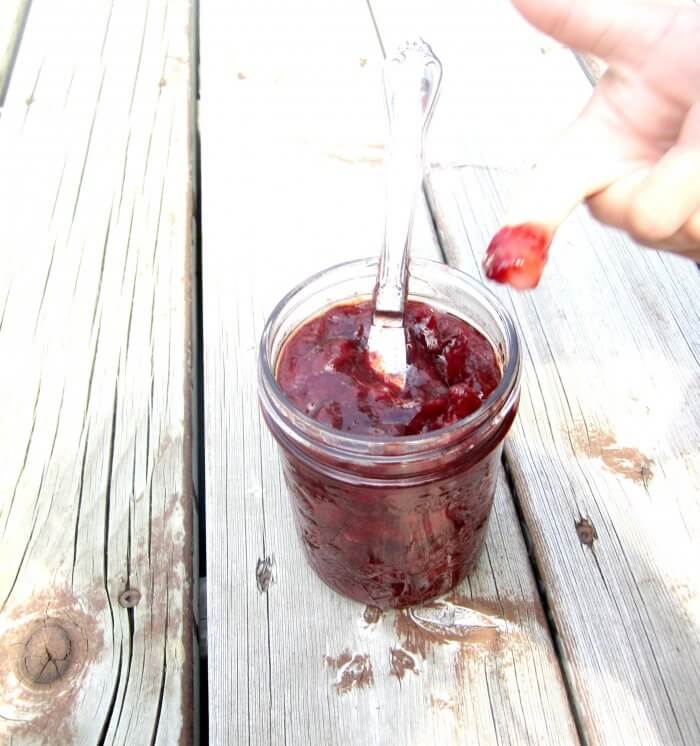
TIP - Fill the jars one a time. This way all jars that are processed are properly filled. You may end up with a partially filled jar at the end. This one does not need to be water-bath processed. This one is your treat! Place a lid on it, allow it to cool and place it in the fridge for immediate use.
TIP - I like to use a wide-mouth canning funnel to fill the jars; it helps keep the rims clean and reduces spilling. They are often included in canning kits or can be purchased separately, in plastic or stainless steel. Mine is plastic.
Water-bath process the jars: Once all jars are filled, and in the canner. Lower the jar basket into the canner. Add enough boiling water to cover the tops of the jars with at least 1 inch of water. Place lid on the canner and bring to a boil.
This jam should process for 10 minutes. Do not start the timer until the kettle has reached a hard boil. Process the jars- which means continuing to boil at a hard boil - for 10 minutes. Do not lift lid during the processing time.
Once the processing time is complete. Turn the heat off the canner and remove the canner lid. Be careful of steam.
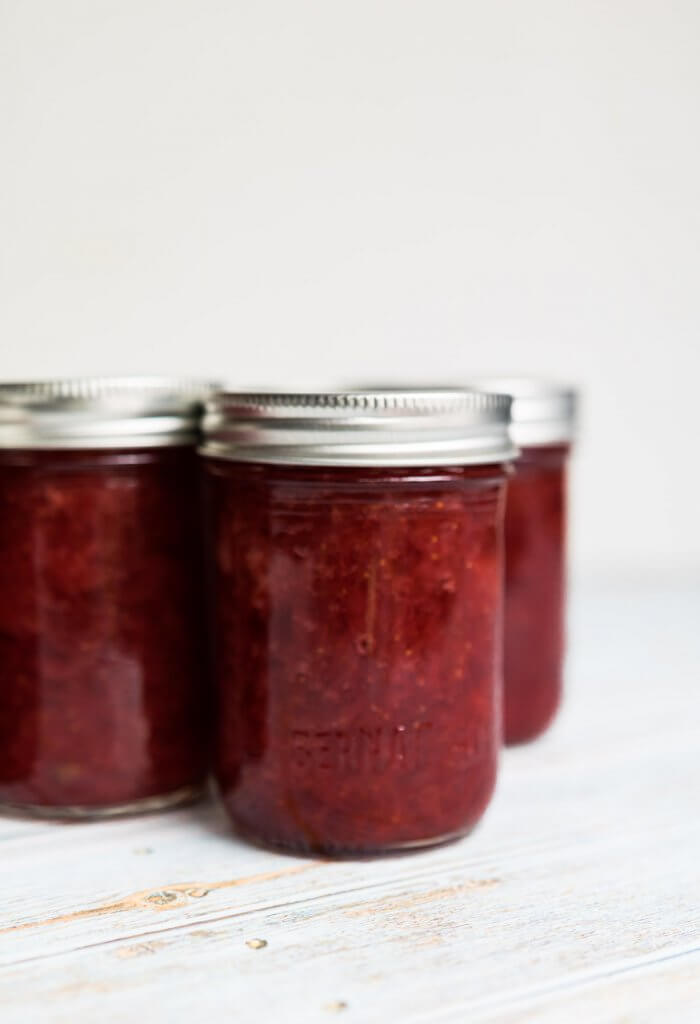
Carefully remove the jars from the canner and set them aside to cool undisturbed for 24 hours before moving them to storage.
Serving and storage
Swirl this jam into vanilla yogurt for a sublime treat.
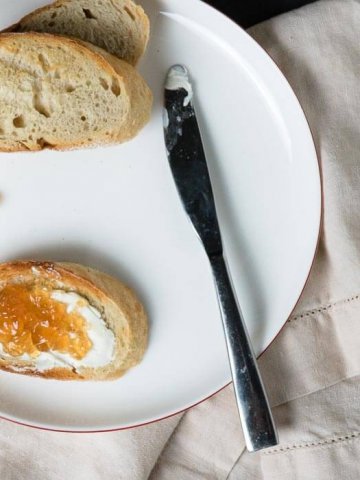
Of course, PB&J or just on buttered toast.
Once opened, the jam will be kept refrigerated for several weeks.
Sealed jars will keep for about 1 year in a cool, dark pantry.
📖 Recipe
Strawberry Banana Jam
Equipment
- 8 half pint or 4 full pint canning jars with 2 piece lids half pint jars are 8oz or 1 cup, perfect size for jam
Ingredients
- 1 pkg pectin I used Certo Light Pectin powder
- 6 cups crushed fruit at least 5 cups of crushed strawberries with enough banana to make a full 6 cups
- 2 tablespoon lemon juice
- 4.5 cups white sugar
Instructions
- Crushing the berries: do this in layers; in a large bowl, 1 layer at a time, pouring each crushed layer into your measuring cup before adding more berries to your crushing bowl. Crush the berries with a potato masher or fork. Do the same with the banana. Continue crushing the fruit until you have 6 cups.
- Combine fruit pectin with ¼ cup of the measured sugar. In a large stainless steel saucepan, combine pectin mixture, lemon juice and the fruit. Bring to a boil over high heat. Once boiling add remaining sugar and return to a hard boil (this means the fruit is bubbling and spitting all over the place), and boil hard for 1 minute.
- Remove from heat, and stir and skim for 5 mins. Skim off any foam that collects on top. It is important to stir and skim for the full 5 mins, this helps create clear jam and ensures the fruit does not float to the top as it sets.
- Fill warm, sterlized jars with the hot jam. Filling one jar at time. Wipe rims if necessary and add hot snap lid, securing with screw top rings until just fingertip tight. Waterbath process for 5 minutes. Processed jars will keep for 12 months in a cool, dark pantry. Once opened use within 5-6 weeks.


Heather says
My family said it was awesome and it was. Very easy to make
Trish says
So glad you liked it 😍
Kristine Whipple says
This was a HUGE hit!
Trish says
So happy you liked it!